How to Render Guanciale Perfectly for Carbonara
Master the cold-pan technique for rendering guanciale. Learn how to get crispy, golden guanciale with perfectly rendered fat for carbonara sauce.
How to Render Guanciale Perfectly for Carbonara
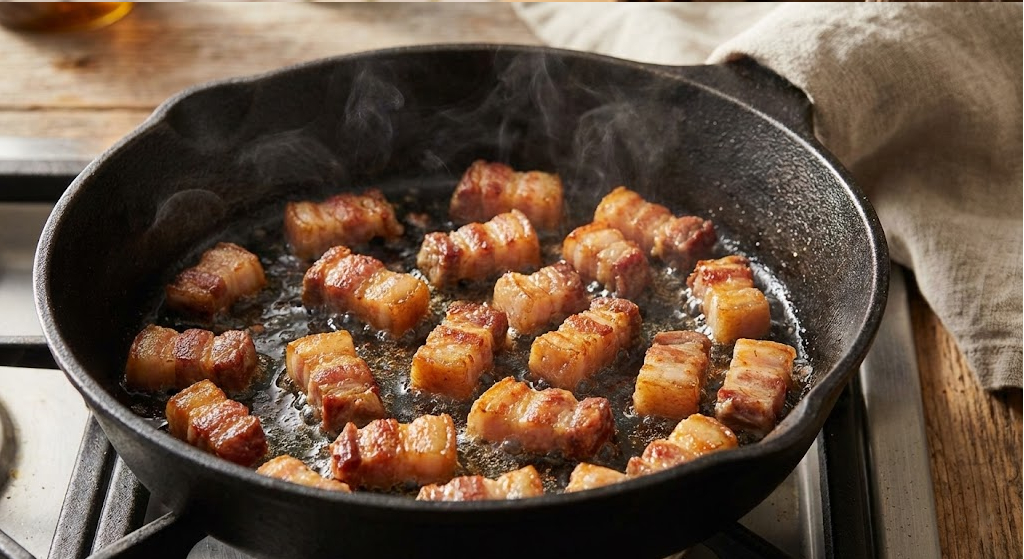
Rendering guanciale correctly is essential for authentic carbonara. The cold-pan technique produces clean, fragrant fat and crispy, golden guanciale pieces—the foundation of perfect carbonara sauce.
Why the Cold-Pan Technique Matters
The problem: Starting guanciale in a hot pan causes the exterior to burn before the fat renders, creating bitter flavors and uneven cooking.
The solution: Starting in a cold pan allows the fat to melt gradually, rendering cleanly while the meat cooks evenly.
Why it works:
- Fat renders slowly and evenly
- Meat cooks through without burning
- Produces clean, fragrant fat (essential for emulsion)
- Creates crispy exterior with tender interior
- No bitter, burned flavors
Step-by-Step Rendering Technique
Step 1: Prepare the Guanciale
Cutting:
- Cut guanciale into 1cm (about 1/2 inch) cubes or strips
- Uniform size ensures even cooking
- Remove any rind if present (though some prefer to keep it)
Temperature:
- Use guanciale straight from the refrigerator
- Cold guanciale renders more slowly and evenly
Pro Tip: Don’t let guanciale come to room temperature—cold is better for rendering.
Step 2: Start in a Cold Pan
Critical step: Place guanciale pieces in an unheated pan.
- Use a large skillet or pan (enough space for pieces to spread out)
- Don’t add oil—guanciale has enough fat
- Arrange pieces in a single layer (don’t crowd)
Why cold pan:
- Prevents burning before fat melts
- Allows gradual temperature increase
- Produces clean, clear fat
- Ensures even cooking
Step 3: Turn on Heat and Cook Slowly
Heat setting: Medium-low heat (about 3-4 on most stoves)
Process:
- Turn heat to medium-low
- Cook for 8-12 minutes, stirring occasionally
- Watch for fat to start rendering (clear liquid appears)
- Continue until pieces are golden-brown
Visual cues:
- Fat should render clear (not cloudy)
- Pieces should sizzle gently (not aggressively)
- Color should change from pink to golden-brown
- Pieces should shrink slightly as fat renders
Timing:
- 8-10 minutes: Fat rendered, pieces golden
- 10-12 minutes: Extra crispy (if preferred)
- Don’t overcook: Pieces become tough and bitter
Step 4: Monitor the Process
What to watch for:
Early stage (0-4 minutes):
- Pan starts warming
- Fat begins melting
- Pieces start to sizzle gently
- No color change yet
Middle stage (4-8 minutes):
- Clear fat accumulates in pan
- Pieces start to shrink
- Color begins changing to golden
- Sizzling increases slightly
Final stage (8-12 minutes):
- Pieces are golden-brown
- Crispy on the outside
- Fat is clear and abundant
- Ready to use
Warning signs:
- Smoking pan: Heat too high—reduce immediately
- Dark brown/black: Overcooked—remove from heat
- Cloudy fat: Starting too hot or poor quality guanciale
- Tough pieces: Overcooked—reduce time next time
Step 5: Remove and Use
When it’s done:
- Pieces are golden-brown (not dark brown)
- Crispy exterior, slightly chewy interior
- Fat is clear and fragrant
- Pieces have shrunk by about 30%
Removing:
- Use a slotted spoon to remove guanciale pieces
- Leave the rendered fat in the pan (this is your sauce base)
- Set guanciale aside on paper towels if desired
Using the fat:
- This rendered fat is essential for carbonara
- It provides the base for the egg emulsion
- Should be clear, fragrant, and abundant
Common Mistakes to Avoid
❌ Starting in a hot pan — Causes burning before fat renders
❌ Heat too high — Creates bitter, burned flavors
❌ Crowding the pan — Pieces steam instead of render
❌ Stirring too much — Prevents proper browning
❌ Overcooking — Makes pieces tough and bitter
❌ Removing fat — You need this fat for the sauce!
Troubleshooting
My Guanciale Burned
Problem: Pieces are dark brown or black
Cause: Heat too high or cooked too long
Solution:
- Next time, use lower heat
- Remove pieces earlier
- Start in truly cold pan
Fat Didn’t Render
Problem: Pieces are still soft, no fat in pan
Cause: Heat too low or not enough time
Solution:
- Increase heat slightly (still medium-low)
- Cook longer (up to 12 minutes)
- Ensure pan is large enough
Fat Is Cloudy
Problem: Rendered fat is cloudy, not clear
Cause: Starting too hot or poor quality guanciale
Solution:
- Always start in cold pan
- Use medium-low heat
- Source better quality guanciale
Pieces Are Tough
Problem: Guanciale pieces are hard and chewy
Cause: Overcooked
Solution:
- Reduce cooking time
- Remove when golden (not dark brown)
- Lower heat slightly
Temperature Science
Why cold pan works:
- Gradual heating: Fat melts slowly as pan warms
- Even cooking: Meat cooks through before exterior burns
- Clean rendering: Slow rendering produces clear fat
- Flavor preservation: No bitter compounds from burning
Optimal temperatures:
- Pan start: Room temperature (cold)
- Cooking: Medium-low (about 300-325°F / 150-165°C)
- Fat rendering point: Around 200°F (93°C)
- Final temperature: Pieces reach about 350°F (175°C)
Using Rendered Guanciale in Carbonara
After rendering:
- Remove pan from heat (if not already)
- Add drained pasta to pan with rendered fat
- Toss pasta to coat with fat
- Add guanciale pieces back to pan
- Proceed with egg mixture as usual
The fat is essential:
- Provides base for egg emulsion
- Adds rich, porky flavor
- Helps create creamy sauce
- Don’t drain it—you need it!
Variations
Extra Crispy Guanciale
Cook for 12-15 minutes on medium-low heat. Pieces will be very crispy, almost like bacon bits.
Softer Guanciale
Cook for 8-10 minutes. Pieces will be golden but still slightly soft in the center.
Thick-Cut Rendering
If using thicker pieces (1.5cm), increase time to 12-15 minutes to ensure interior cooks through.
Frequently Asked Questions
Can I use the same technique for pancetta?
Yes! The cold-pan technique works identically for pancetta. Cooking time may be slightly shorter (8-10 minutes).
What if I don’t have enough fat?
If fat seems insufficient:
- You may have removed too much fat when cutting
- Use slightly more guanciale next time
- Add a small amount of olive oil if absolutely necessary (not ideal)
Can I render guanciale ahead of time?
Yes, but it’s best fresh. If rendering ahead:
- Store rendered fat and pieces separately
- Reheat gently before using
- Fat may solidify—warm it before using
Should I remove the rind?
Most prefer to remove the rind, but some keep it for extra flavor. If keeping it, cut it into smaller pieces as it takes longer to render.
What pan should I use?
Use a large skillet or sauté pan:
- Large enough for pieces to spread out
- Heavy-bottomed for even heat
- Non-stick works well but isn’t essential
Pro Tips
- Always start cold — This is non-negotiable
- Don’t rush — Slow rendering produces better results
- Save the fat — It’s essential for carbonara sauce
- Watch closely — Golden brown is perfect, dark brown is too far
- Use good guanciale — Quality matters for clean rendering
- Don’t crowd — Single layer ensures even cooking
- Stir occasionally — Prevents sticking, but don’t overdo it
Related Content
- Guanciale vs Pancetta vs Bacon — Learn the differences
- Authentic Roman Carbonara Guide — Complete recipe using rendered guanciale
- Classic Spaghetti Carbonara — Step-by-step recipe
- Best Guanciale to Buy — Find quality guanciale
Technique tested and perfected — This rendering method has been tested multiple times to ensure it produces perfect guanciale every time. The cold-pan technique is essential for authentic carbonara.