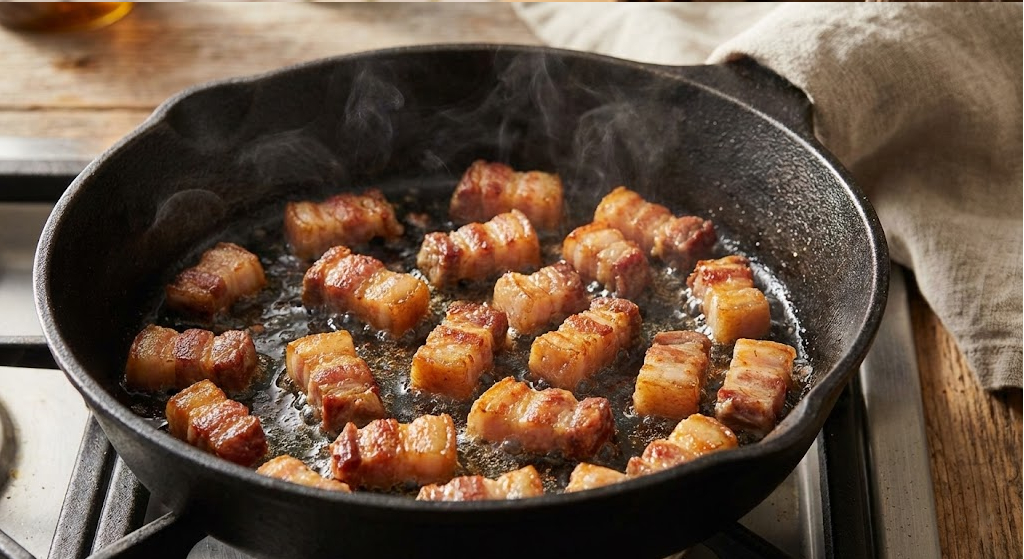
How to Render Guanciale Perfectly for Carbonara
Rendering guanciale correctly is essential for authentic carbonara. The cold-pan technique produces clean, fragrant fat and crispy, golden guanciale pieces—the foundation of perfect carbonara sauce.
Why the Cold-Pan Technique Matters
The problem: Starting guanciale in a hot pan causes the exterior to burn before the fat renders, creating bitter flavors and uneven cooking.
The solution: Starting in a cold pan allows the fat to melt gradually, rendering cleanly while the meat cooks evenly.
Why it works:
- Fat renders slowly and evenly
- Meat cooks through without burning
- Produces clean, fragrant fat (essential for emulsion)
- Creates crispy exterior with tender interior
- No bitter, burned flavors
Step-by-Step Rendering Technique
Step 1: Prepare the Guanciale
Cutting:
- Cut guanciale into 1cm (about 1/2 inch) cubes or strips
- Uniform size ensures even cooking
- Remove any rind if present (though some prefer to keep it)
Temperature:
- Use guanciale straight from the refrigerator
- Cold guanciale renders more slowly and evenly
Pro Tip: Don’t let guanciale come to room temperature—cold is better for rendering.
Step 2: Start in a Cold Pan
Critical step: Place guanciale pieces in an unheated pan.
- Use a large skillet or pan (enough space for pieces to spread out)
- Don’t add oil—guanciale has enough fat
- Arrange pieces in a single layer (don’t crowd)
Why cold pan:
- Prevents burning before fat melts
- Allows gradual temperature increase
- Produces clean, clear fat
- Ensures even cooking
Step 3: Turn on Heat and Cook Slowly
Heat setting: Medium-low heat (about 3-4 on most stoves)
Process:
- Turn heat to medium-low
- Cook for 8-12 minutes, stirring occasionally
- Watch for fat to start rendering (clear liquid appears)
- Continue until pieces are golden-brown
Visual cues:
- Fat should render clear (not cloudy)
- Pieces should sizzle gently (not aggressively)
- Color should change from pink to golden-brown
- Pieces should shrink slightly as fat renders
Timing:
- 8-10 minutes: Fat rendered, pieces golden
- 10-12 minutes: Extra crispy (if preferred)
- Don’t overcook: Pieces become tough and bitter
Step 4: Monitor the Process
What to watch for:
Early stage (0-4 minutes):
- Pan starts warming
- Fat begins melting
- Pieces start to sizzle gently
- No color change yet
Middle stage (4-8 minutes):
- Clear fat accumulates in pan
- Pieces start to shrink
- Color begins changing to golden
- Sizzling increases slightly
Final stage (8-12 minutes):
- Pieces are golden-brown
- Crispy on the outside
- Fat is clear and abundant
- Ready to use
Warning signs:
- Smoking pan: Heat too high—reduce immediately
- Dark brown/black: Overcooked—remove from heat
- Cloudy fat: Starting too hot or poor quality guanciale
- Tough pieces: Overcooked—reduce time next time
Step 5: Remove and Use
When it’s done:
- Pieces are golden-brown (not dark brown)
- Crispy exterior, slightly chewy interior
- Fat is clear and fragrant
- Pieces have shrunk by about 30%
Removing:
- Use a slotted spoon to remove guanciale pieces
- Leave the rendered fat in the pan (this is your sauce base)
- Set guanciale aside on paper towels if desired
Using the fat:
- This rendered fat is essential for carbonara
- It provides the base for the egg emulsion
- Should be clear, fragrant, and abundant
Common Mistakes to Avoid
❌ Starting in a hot pan — Causes burning before fat renders
❌ Heat too high — Creates bitter, burned flavors
❌ Crowding the pan — Pieces steam instead of render
❌ Stirring too much — Prevents proper browning
❌ Overcooking — Makes pieces tough and bitter
❌ Removing fat — You need this fat for the sauce!
Troubleshooting
My Guanciale Burned
Problem: Pieces are dark brown or black
Cause: Heat too high or cooked too long
Solution:
- Next time, use lower heat
- Remove pieces earlier
- Start in truly cold pan
Fat Didn’t Render
Problem: Pieces are still soft, no fat in pan
Cause: Heat too low or not enough time
Solution:
- Increase heat slightly (still medium-low)
- Cook longer (up to 12 minutes)
- Ensure pan is large enough
Fat Is Cloudy
Problem: Rendered fat is cloudy, not clear
Cause: Starting too hot or poor quality guanciale
Solution:
- Always start in cold pan
- Use medium-low heat
- Source better quality guanciale
Pieces Are Tough
Problem: Guanciale pieces are hard and chewy
Cause: Overcooked
Solution:
- Reduce cooking time
- Remove when golden (not dark brown)
- Lower heat slightly
Temperature Science
Why cold pan works:
- Gradual heating: Fat melts slowly as pan warms
- Even cooking: Meat cooks through before exterior burns
- Clean rendering: Slow rendering produces clear fat
- Flavor preservation: No bitter compounds from burning
Optimal temperatures:
- Pan start: Room temperature (cold)
- Cooking: Medium-low (about 300-325°F / 150-165°C)
- Fat rendering point: Around 200°F (93°C)
- Final temperature: Pieces reach about 350°F (175°C)
Using Rendered Guanciale in Carbonara
After rendering:
- Remove pan from heat (if not already)
- Add drained pasta to pan with rendered fat
- Toss pasta to coat with fat
- Add guanciale pieces back to pan
- Proceed with egg mixture as usual
The fat is essential:
- Provides base for egg emulsion
- Adds rich, porky flavor
- Helps create creamy sauce
- Don’t drain it—you need it!
Variations
Extra Crispy Guanciale
Cook for 12-15 minutes on medium-low heat. Pieces will be very crispy, almost like bacon bits.
Softer Guanciale
Cook for 8-10 minutes. Pieces will be golden but still slightly soft in the center.
Thick-Cut Rendering
If using thicker pieces (1.5cm), increase time to 12-15 minutes to ensure interior cooks through.
Pro Tips
- Always start cold — This is non-negotiable
- Don’t rush — Slow rendering produces better results
- Save the fat — It’s essential for carbonara sauce
- Watch closely — Golden brown is perfect, dark brown is too far
- Use good guanciale — Quality matters for clean rendering
- Don’t crowd — Single layer ensures even cooking
- Stir occasionally — Prevents sticking, but don’t overdo it